Showing posts with label Meatless Mondays. Show all posts

Monday, June 20, 2011

greens overload--conquered!

Our CSA has been pretty much straight greens for the first two weeks.  Spinach, kale, arugula, bok choy, mustard greens.  Although I could freeze the spinach and possibly some of the other greens, I've decided to take on the challenge of working through bag upon bag of leafy greens.  

spicy greens and soba noodles

Have you ever had the experience where you look at a beautiful seasonal cookbook in late winter and salivate over the early spring recipes?  Then you realize you're in the upper Midwest and those spring ingredients won't be available locally until June, or late May if you're lucky.  I'm trying not to whine about other parts of the country being way ahead of our growing season.  Instead I'm pulling out my spring recipes and enjoying the first crops of the Wisconsin summer.

heat sources utilized

I've been taking some liberties with my recipes since I have had spring garlic and onions readily available.  In addition to a couple of cloves of garlic, I added my last spring garlic stalk and tripled the green onion input.  I was also pretty liberal with the ginger.  And I opted to use some teeny tiny serrano peppers from the farmer's market in place of the crushed red chili flake.  But when I got to tasting the noodles, the heat from the peppers was not coming through, so I threw in a scant teaspoon of gochugaru, Korean chili powder.  When that wasn't cutting it either, Matt suggested we turn to togarashi, a tasty Japanese seasoning mix of sesame seeds, chili powder, orange peel, and more that was one of the only spicy things to cross our lips in Japan.  My good friend togarashi finally did the trick.


This is an easy and solid stir fry that could be very flexible with the greens and seasonings used.  Throw in whatever greens you've got on hand--they cook down quite a bit.  It calls for balsamic vinegar, which I can only assume is a stand-in for Chinese black vinegar.  Along with the rice vinegar, I thought it lent kind of an odd sweetness to the dish, so I think next time I might try sherry vinegar instead.  

Spicy Greens and Soba Noodles
very slightly adapted from Cookstr.com

6 oz soba noodles; or substitute other Asian noodles such as udon, somen, or ramen 
2 tsp sesame oil; or substitute peanut oil
1 tbsp vegetable oil, preferably peanut
1-2 tbsp grated fresh ginger
2 tsp minced garlic
½ tsp crushed red chile, such as piquin
¼ c chicken or vegetable broth (be sure to use vegetable broth for a completely vegetarian dish!)
8 oz mustard greens, bok choi, spinach, or other greens, stems removed and coarsely chopped
2 oz straw mushrooms (I omitted these this time)
1 c mung bean sprouts
1 tbsp toasted sesame seeds for garnish, plus sriracha, sambal, or togarashi as desired

    For the sauce:
    1 tbsp balsamic or sherry vinegar
    4 tsp rice vinegar
    1 tbsp peanut oil
    2 tsp light soy sauce
    1-3 green onions, chopped
    ¼ tsp dark sesame oil
    ¼ tsp crushed red chile, such as piquin or gochigaru
    ¼ tsp sugar
      Cook the noodles according to the directions on the package. Drain and rinse the noodles and place in a bowl. Add the sesame oil and toss to coat.  Combine all the sauce ingredients in a bowl and stir to mix.
      Heat a heavy skillet or wok over medium-high heat, add the vegetable oil, and when hot, add the ginger, garlic, and chile and stir-fry for a couple of minutes.  Add the broth, and when simmering, add the greens and cook until done. Add the mushrooms and mung beans and cook for a couple of minutes.  Stir the sauce into the vegetable mixture, add the noodles, and toss to coat and reheat.  Put the noodles into a bowl, garnish with toasted sesame seeds, and serve.
      A meatless meal actually on a Monday...imagine that!

      Sunday, May 8, 2011

      happy mother's day


      Today on Mother's Day I'm thinking about how much of my cooking abilities and interests are because my mom also loved to cook.  I have often observed that I was never taught to do things like cut fruits and vegetables--I just sat and watched my mom.  I know how to make basic meals without a recipe the same way my mom did, which oftentimes I think she learned from her mom.  I hope I can pass that knowledge along someday.  I also give her credit for helping me develop my tastes in food.  She introduced me to different flavors from early on and set the ball rolling for me to expand my tastes more and more.   Cooking and eating are such a big part of my life and I enjoy sharing it with my mom still.  Thanks, Mom!


      Orecchiette with Broccoli Rabe and Goat Cheese
      from Serious Eats (I think there's a missing step in their recipe, so I've filled in the blanks below with what I did.)

      1 lb broccoli rabe, chopped
      1/3 c extra-virgin olive oil
      6 garlic cloves, chopped
      3/4 tsp crushed red chile flakes
      12 oz orecchiette (I can never find orecchiette at my grocery store, so I used a short-cut pasta that looked close enough.)
      2 tbsp lemon zest
      4 oz goat cheese, sliced 
      salt
       

      Pour about 8 quarts of water into a large pot, add a few tablespoons of salt, and bring it to a boil. Toss in the broccoli rabe and cook for 4 minutes. Remove it with a pair of tongs and immediately toss it in some ice water. Chill for a few minutes then drain and pat dry.

      Heat the olive oil in a large skillet on medium heat.  Add the garlic and red pepper flakes and saute 1-2 minutes until garlic is just golden.  Add the broccoli rabe and cook 3-5 minutes until stalks are tender and the leaves wilted.

      Meanwhile, bring the pot of water back to a boil and cook the orecchiette according to the directions on the box. Taste the pasta with a minute left on the timer. If al dente, turn off the heat, drain the pasta, and transfer it to the skillet. Turn the heat to high, add the lemon zest, and season with salt. Cook for a minute, stirring constantly.

      Transfer the pasta to bowls or plates. Add a bit of goat cheese to each one. Serve.

      Monday, April 18, 2011

      easy french onion soup

      Okay, so here comes the second soup post in a row.  But that's because I could probably eat soup every other day.  And it's an easy meal to make hearty and yet vegetarian.  The soup I made used chicken broth, but could easily be made with a nice homemade veggie broth.  I keep scraps of veggies and chicken or other meat bones in large bags in the freezer, then when I need broth, I just pop the contents of the bag into the crock pot, covered with water, and cook it on low for 18-24 hours.  How long you let it go depends on how strong you want your broth and how stinky you are willing to let your house get.  Ha.

      french onion soup on Matt's grandma's handmade hotpad

      I liked that this recipe was simple, but I thought it was just a tad bit too simple, so I added a couple of garlic cloves and some dried thyme to the onions.  Then it seemed just right.

       you know it's good--look at that doggy snout trying to get at it!


      Quick, Light French Onion Soup
      slightly adapted from Serious Eats
      serves 4


      1 pound sweet white or yellow onions, peeled and thinly sliced
      2 cloves garlic, thinly sliced
      1 tsp dried thyme
      2 cups dry white wine, such as Muscadet
      2 tablespoons butter
      6 cups chicken or vegetable stock, preferably homemade
      1 bay leaf
      4 slices crusty bread or baguette
      2 cups (5 ounces) freshly grated Gruyere cheese
      Preheat the oven to 500°F. Combine the onions, garlic, thymewine, butter, and a large pinch of salt in a baking dish and cook, uncovered, until the wine is absorbed almost completely into the onions, and they are tender and golden, 45 minutes or perhaps a little longer.
      In the meantime, bring the chicken or vegetable stock and bay leaf to a simmer in a large saucepan. Season to taste with salt and pepper.
      When the onions are finished, divide them among 4 deep broiler-safe bowls. Cover the onions with chicken stock to fill the bowls, and place a slice of bread on each. Distribute the grated cheese over the bread and broil until the cheese is golden and bubbling, 2 to 3 minutes. 


      Sunday, April 10, 2011

      early spring warmth

      We're still at a point in the spring season where we'll see chilly and rainy and generally miserable days, so I still need soup.  But I'm definitely getting to the point where I want lighter, more vegetable-based foods.  This soup provided a nice balance.


      I love Cook's Country's take on posole, but I can only take that fatty, pork-filled stew so often.  This potato soup begins with a similar pureed onion and chili base.  I opted for a can of crushed fire-roasted tomatoes instead of crushed fresh, but if you have nice fresh tomatoes around, go for it.

      I also wanted to add another texture or flavor, and debated between frozen sweet corn or hominy.  I decided on hominy this time to keep the flavors smoky and earthy like the pork posole.  If I make this later into the spring or summer it would be nice to use frozen or fresh sweet corn to brighten up the whole soup.

      Mexican Potato Soup
      adapted from Serious Eats
      1 lb boiling potatoes, peeled and diced (about 2 cups)
      Kosher salt 
      28-oz can crushed fire-roasted tomatoes or 3 large red ripe tomatoes, about 1 1/4 pounds, peeled and coarsely chopped
      1 medium onion, coarsely chopped (about 1 cup)
      2 cloves garlic, coarsely chopped
      1 canned chipotle in adobo sauce, coarsely chopped
      2 c homemade chicken or vegetable stock (of course, go for veggie broth if you want it vegetarian)
      28-oz can hominy (optional)
      1/3 c cilantro, finely chopped
      Place in large saucepan and cover with water by about three inches. Season water with salt. Bring to a boil and cook until tender but firm to the bite (potatoes will cook further in step 2). Drain potatoes and set aside. Meanwhile, blend tomatoes, onion, garlic, and chipotle pepper in blender at high speed until smooth, about 30 seconds.
      Pour tomato mixture into large saucepan. Add vegetable stock and potatoes. Stir to combine and season to taste with salt. Bring to a boil over medium-high heat. Reduce heat to medium and simmer until potatoes are completely tender, about 7 to 8 minutes. For thicker broth, mash a few potatoes against side of pot with wooden spoon. Add cilantro and hominy (if using) simmer for 2 minutes longer, or until hominy is warm. Serve immediately with extra cilantro and sour cream (I use Greek yogurt) as desired. 


      Sunday, March 27, 2011

      gorgonzola tortellini


      Awhile back I picked up a package of gorgonzola tortellini from a great Madison pasta maker, RP's.  Our local grocery store just started carrying it again to my delight.  Anytime I can buy a local product I'm happy, but especially so when the product is high quality and not prohibitively expensive.  I figured I'd find something to do with it and went searching for a recipe.

       gorgonzola tortellini with walnut cream sauce
      on my favorite Charley Harper book!

      What do you know, but RP's has suggested recipes at their site for their pastas!  I gladly accepted the suggestion, but added some sauteed mushrooms and peas.  The vegetables brought some much-needed freshness to the otherwise heavy dish.  I also swapped the sour cream out for non-fat Greek yogurt, which may have been the reason my sauce was less than smooth.  I'll take any pointers anyone has for keeping a cream sauce from breaking!  In any case, the texture was not ultimately affected since the final addition of ground walnuts makes the sauce lumpy anyway.

      Oh, and this is the prequel to the mascarpone post from the other day.


      Gorgonzola Tortelloni with Walnut Cream Sauce
      adapted from RP's Fresh Pasta
      serves 2

      I used less pasta then the recipe called for, but kept the sauce ingredients the same, since I like a saucy pasta.  If you like things a bit drier, cut back the sauce ingredients or up the pasta to 1 lb.

      1/2 c walnuts
      9 oz  RP's Fresh or Frozen Gorgonzola Tortellini
      3 tbsp butter
      5 crimini (baby bella) mushrooms, sliced
      1 clove garlic crushed
      1/3 c milk
      1/2 c sour cream or plain yogurt
      1/3 c mascarpone cheese
      1 c fresh or frozen peas
      1/4 tsp salt

       Heat an empty pan over medium heat and cook walnuts until browned.  Grind toasted walnuts in a food processor or spice grinder.  Wipe out the pan carefully with a paper towel. 

      Return pan to heat and melt 1-2 tbsp butter.  Cook mushroom slices in butter until browned and cooked down, about 5 minutes.  Add garlic and cook 1-2 more minutes.  Add milk, sour cream or yogurt, and mascarpone.  Add peas and bring to a light simmer and reduce slightly.

      Add ground walnuts and salt.  Boil gorgonzola tortellini until tender and top with sauce. Garnish with chopped fresh parsley.

      Sunday, March 20, 2011

      friday night pizza

      I'm on spring break for the next week, so my goal is to blog every day--I definitely have plenty of pictures backed up.


      On Friday nights I often feel like "junk food" to wind down the week and kick off the weekend.  Sometimes it's a burger or nachos.  Last week it was pizza.  As spring creeps out of hiding more and more, I find myself wanting to eat more fruits and vegetables.  On the other hand, it's still chilly at night and I want something hearty.  So, I made a vegetarian pizza, but one with enough heft to fill me up.  Meaty veggies like zucchini, eggplant, roasted peppers, or mushrooms are a must.  This one involves roasted marinated mushrooms and zucchini.  The marinade with its soy sauce for salt and maple syrup for sweetening may sound a little crunchy-granola, but trust me, it gives the whole thing a lot of depth.  The recipe is from a whole foods (and I think vegan?) cookbook, so the original recipe didn't include cheese, but--hey--this is Wisconsin.

      I am typically not ambitious enough to make my own pizza dough on any night of the week, but I am certainly not in the mood on Friday nights.  I'd tried various flatbreads and pre-made crusts with some success, but I really liked the pita-marketed-as-pizza-crust from Kontos that I tried this time. The chewy, crispy crust was topped with the rich and tangy roasted and marinated veggies, a smoky and garlicky sauce, and melty fresh mozzarella.  It was a hit and will certainly reappear in the summer when the vegetables are available locally.

      My only complaint is that the zucchini left a bit of unwanted liquid behind under the cheese, so next time I would squeeze out some of the excess water before placing it on the pizza.


      Rustic Tomato Thin Crust Pizza with Roasted Zucchini, Portobello Mushroom, and Red Onion
      slightly adapted from The Balanced Plate by Renee Loux

      Try this with a sprinkle of aleppo pepper or some peperoncini and a nice beer like New Glarus apple ale!

      3 tbsp + 2 tsp olive oil
      1-2 garlic cloves, minced
      1 tsp balsamic vinegar
      1 tsp soy sauce
      1/2 tsp maple syrup
      2 tsp fresh thyme or 1 tsp dried (optional)
      1 large portobello mushroom or 5 baby bella (crimini) mushrooms, thinly sliced
      1 medium zucchini, thinly sliced
      Kosher salt
      Black pepper
      2 round flatbreads (6"), 2 tortillas (9"), or 1 large flatbread (9'-12')
      1/2 c tomato sauce, purchased or homemade (see below for recipe)
      2-4 oz fresh mozzarella, sliced

      1/2 c thinly sliced red onion
      6 cherry tomatoes, halved

      Preheat the broiler.  In a small bowl, mix together 1 1/2 tbsp olive oil, the garlic, balsamic, soy sauce, maple syrup, and thyme (if using).  Pour over the mushroom and toss to coat evenly.  Let stand for 10 minutes or more to absorb and develop flavor.

      In a separate bowl, toss the zucchini with 2 tsp of olive oil.   Sprinkle with a pinch of salt and pepper.  Place both the mushroom and zucchini on a baking sheet under the broiler until browned, about 10-12 minutes.  Set aside to cool.  When cool enough to handle, gently press on the zucchini with a paper towel until the vegetable has released most of its excess water.

      Preheat the oven to 500 degrees Fahrenheit.  Brush one side of the bread or tortillas with the remaining 1 1/2 tbsp of olive oil.  Place the oiled side face down on a baking sheet or pizza stone.  This will make it crisp nicely.  Spread the sauce evenly over the bread or tortillas, leaving just a 1/4" border at the edge.  Distribute the mushroom and zucchini evenly.  Cover with the mozzarella slices, then sprinkle the red onion slices and cherry tomato halves over the top of the cheese.

      Bake on the middle rack for 15-20 minutes, until the edges are golden brown.  Let cool enough to cut and serve.


      Quick Tomato Sauce

      28-oz can fire-roasted diced tomatoes
      3-4 cloves garlic, minced
      olive oil

      Drizzle about 1 tbsp olive oil in a large saucepan.  Heat on medium heat, then add the garlic and saute for 1-2 minutes, until beginning to brown.  Add can of tomatoes with juices and cook, stirring frequently, until liquid is mostly cooked off and the sauce is thickened.  Add salt if you like.

      Sunday, February 20, 2011

      eat your veggies

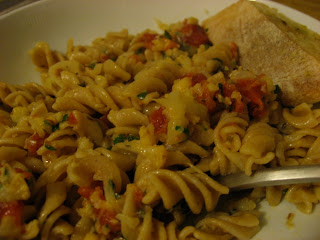
      creamy cauliflower and pasta

      I love cauliflower.  Raw, cooked, in cheese sauce, and especially in this pasta.  Luckily, my husband, who is usually cauliflower-averse, also likes this pasta.  The cauliflower is meant to be creamy and fall-apart tender.  Really it just melts in with the pasta and Parmesan.  I made this once before, but didn't cook the florets long enough--trust me, you don't want the cauliflower tender-crisp in this case.  I also added in a can of diced tomatoes this time, which added to the pizza-type flavor of this dish along with the garlic, oregano, and cheese.  I used the end of a block of Wisconsin Parmesan to top the pasta, but recently I bought a chunk of Parmesan from Hook's cheese out of Mineral Point.  It's by far the best Parmesan I've ever tasted and would have made this meal even better.  Alongside a piece of baguette slathered with roasted garlic, the whole wheat pasta and cauliflower made this a hearty (and fairly healthy) winter meal.

      Every time I browse through my favorite cookbook, Simply Organic, I find more to try.  This recipe is located in the "deep winter" section of the book, but I'm looking forward to trying it again when we can get local cauliflower from our CSA or the farmer's market.  And, as a side note, we signed up for the CSA through Amazing Grace once again.  So excited for spring to come!


      Creamy Cauliflower and Pasta
      from Simply Organic by Jesse Ziff Cool

      1 head cauliflower, cut into florets
      1 lb whole wheat pasta, such as shells or rotelle
      1/3 c olive oil
      4 garlic cloves, thinly sliced
      1/2 c dry white wine
      15-oz can diced tomatoes, drained (optional, but recommended)
      1 1/2 tbsp chopped fresh oregano or 1 1/2 tsp dried oregano
      1/4 c kalamata olives, pitted and chopped (I omitted these--we're not olive fans.)
      1 tsp red pepper flakes
      4 sprigs fresh Italian parsley, stemmed and chopped
      Salt & freshly ground black pepper
      1/4 c shredded Parmesan or Asiago cheese

      Bring a large pot of salted water to boil over high heat.  Add the cauliflower and cook for 5 minutes, or until tender.  Remove with a slotted spoon to a medium bowl, reserving the water.  Cook the pasta according to the package directions in the reserved water.  Drain and transfer to a large serving bowl.

      While the pasta is cooking, in a large skillet heat the oil over medium-high heat.  Add the garlic and cauliflower and cook for 5 minutes, stirring and breaking the cauliflower into bite-sized pieces.  Add the wine, oregano, tomatoes and olives (if using), and red-pepper flakes and cook for 3 minutes, or until the cauliflower is very tender.  Add the parsley and season with salt and pepper to taste.  Pour over the pasta and toss to coat well.  Top with the cheese.

      Sunday, February 13, 2011

      meatless with mushrooms


      This week was a pretty good week for animals.  We had several vegetarian meals, which were all very yummy.  This meal will be my first official "Meatless Monday" link for the Midnight Maniac blog (whose author I was delighted to discover is a fellow Wisconsinite!).  Our vegetarian attempts have recently become even more appealing, as our trip to Japan helped Matt and I both get over our mushroom "issues" once and for all.  Their earthy, meaty qualities were perfect for these flavorful meatless tacos.


      I was able to whip this up fairly quickly since I had roasted and peeled the hot peppers earlier in the week to make our own rendition of this decidedly meat-ful torta (I'll leave description for another post).  I am about ready to start roasting up a huge batch of peppers--poblano, red, yellow, orange, and otherwise hot--on the weekends to have on hand all week for sandwiches, salads, soups, and the like.  I could also use a vat of roasted garlic in the fridge at all times.

      Anyway, I digress.  I simplified the taco recipe a bit by switching out fresh epazote for dried oregano and omitting the coxita cheese.  I also used some frozen fresh salsa I stored away last fall instead of making the salsa quemada, though it sounds quite tasty as well.  Next time we thought we'd add a bit of Greek yogurt (our go-to sour cream substitute), but overall this turned out very well.  But look out--for us this made a ton of filling.  I'll be eating this as a salad topping all week!


      Mushroom, Rajas, and Corn Tacos with Queso Fresco
      adapted (slightly) from Epicurious

      2 Anaheim chiles
      1 poblano chile
      1 c frozen or fresh corn kernels (about 1 ear)
      1 1/2 tbsp olive oil
      Kosher salt
      1/2 white onion, peeled and cut into 1/2-inch dice
      1 lg clove garlic, thinly sliced
      6 oz cremini or white button mushrooms, trimmed and quartered
      1 tsp oregano, preferably Mexican
      Fresh-ground black pepper
      1/2 c queso fresco, cut into small cubes
      6 warm corn tortillas
      Salsa quemada or your favorite salsa
      Cilantro sprigs

      Roast the chiles as for rajas.  If you have a gas stove, it's simple to quickly char the skin on the peppers directly over the gas flame.  If you're like me and are stuck with electric, it's not much more difficult.  I roast the peppers under a hot broiler in a small pan lined with foil for about 5 minutes on each side, staying nearby to check every so often, until all sides are blackened and beginning to blister.  Put the peppers in a plastic zippered bag and seal for about 15 minutes, or until the chiles have cooled and the skin is readily peeled.  Pull the stem from the top and strip the skin from the peppers, then remove the seeds and cut into 1/2-inch dice.

      Heat a heavy pan (preferably cast iron) over medium-high heat until very hot.  If using frozen corn, place corn in colander and rinse until thawed.  Allow to drain and dry somewhat before the next step.  In a bowl, toss the corn with 1 teaspoon of the olive oil and a sprinkling of salt. Spread the corn in the hot pan and let it blacken slightly, without stirring, for 30 seconds. Have a lid ready in case the kernels begin to pop. Remove the roasted corn from the pan.  In the same pan, heat 2 teaspoons of the olive oil. Add the onion and diced chiles and cook, stirring often, until the onion is soft and beginning to brown. Season lightly with salt and remove from the pan.

      Reduce the heat and add the remaining olive oil. Add the garlic and mushrooms. Cook, stirring often, until the mushrooms are cooked through, 2 to 3 minutes. Return the corn and chiles to the pan and stir to reheat.  Turn off the heat and stir in the oregano, black pepper, and queso fresco.
      To assemble the tacos, spoon some vegetables onto a tortilla. Top with a generous tablespoon of salsa. Top with cilantro and sour cream or Greek yogurt, if desired.