Monday, March 28, 2011
in case you didn't notice...
I set up new links at the top of the blog to take you to various types of posts. It's not exactly how I want it, but it's kind of a big deal for me, since I am certainly no web programmer! But it's a first step toward making my blog more my own, so I'm proud. Hope they make things easier to navigate. I welcome feedback!
nickels and anchors
I haven't done a wardrobe post in a long time, and I really haven't taken any shots of my outfits lately, but I happened to get some pictures at a nickel arcade in Chicago last weekend.

I made Matt stop taking pictures of my slack-jawed concentration face and catch my outfit.

The arcade was the greatest place to spend the afternoon! Tetris and PacMan for free and skee ball for nickels. My dress was perfectly comfortable for playing skee ball and had great big pockets for nickels!


I made Matt stop taking pictures of my slack-jawed concentration face and catch my outfit.

dress - Zara in Tokyo
tights and cardigan - Target
boots - Good Style
The arcade was the greatest place to spend the afternoon! Tetris and PacMan for free and skee ball for nickels. My dress was perfectly comfortable for playing skee ball and had great big pockets for nickels!

We finished the night off with a nice dinner with friends. This was the only shot of the front of the dress, with its cute little anchor buttons. I picked up the dress in Shibuya last summer at Zara--pretty much the only affordable place in that neighborhood. Nautical style was everywhere, so there were lots of tempting pieces. I still sort of regret not buying an oversized T-shirt with a huge anchor.

Lucy & me
Sunday, March 27, 2011
gorgonzola tortellini

Awhile back I picked up a package of gorgonzola tortellini from a great Madison pasta maker, RP's. Our local grocery store just started carrying it again to my delight. Anytime I can buy a local product I'm happy, but especially so when the product is high quality and not prohibitively expensive. I figured I'd find something to do with it and went searching for a recipe.

gorgonzola tortellini with walnut cream sauce
on my favorite Charley Harper book!
What do you know, but RP's has suggested recipes at their site for their pastas! I gladly accepted the suggestion, but added some sauteed mushrooms and peas. The vegetables brought some much-needed freshness to the otherwise heavy dish. I also swapped the sour cream out for non-fat Greek yogurt, which may have been the reason my sauce was less than smooth. I'll take any pointers anyone has for keeping a cream sauce from breaking! In any case, the texture was not ultimately affected since the final addition of ground walnuts makes the sauce lumpy anyway.
Oh, and this is the prequel to the mascarpone post from the other day.

Gorgonzola Tortelloni with Walnut Cream Sauce
adapted from RP's Fresh Pasta
serves 2
I used less pasta then the recipe called for, but kept the sauce ingredients the same, since I like a saucy pasta. If you like things a bit drier, cut back the sauce ingredients or up the pasta to 1 lb.
1/2 c walnuts
9 oz RP's Fresh or Frozen Gorgonzola Tortellini
3 tbsp butter
5 crimini (baby bella) mushrooms, sliced
1 clove garlic crushed
1/3 c milk
1/2 c sour cream or plain yogurt
1/3 c mascarpone cheese
1 c fresh or frozen peas
1/4 tsp salt
Heat an empty pan over medium heat and cook walnuts until browned. Grind toasted walnuts in a food processor or spice grinder. Wipe out the pan carefully with a paper towel.
Return pan to heat and melt 1-2 tbsp butter. Cook mushroom slices in butter until browned and cooked down, about 5 minutes. Add garlic and cook 1-2 more minutes. Add milk, sour cream or yogurt, and mascarpone. Add peas and bring to a light simmer and reduce slightly.
Add ground walnuts and salt. Boil gorgonzola tortellini until tender and top with sauce. Garnish with chopped fresh parsley.
Labels:
cooking,
food,
Italian,
local,
Madison,
mascarpone,
Meatless Mondays,
pasta,
vegetables,
vegetarian
2
comments

Friday, March 25, 2011
breakfast of champions
You know how you buy an ingredient for a recipe, use the tiniest scoop, then have the majority of it left to deal with? How sometimes those things go bad before you can find a use for them? With the recipe I found, a leftover container of mascarpone is not a problem.

This sandwich was inspired by a recipe for a mascarpone and Nutella grilled cheese topped with strawberries, but if I bought a jar of Nutella, I'd be in the same mess all over again. And as good as Nutella is, I didn't want it around to chocolify every breakfast. So, I cut the Nutella and put the strawberries inside the sandwich. Also, the recipe called for brioche, which I couldn't find at my local grocery store, so I went with challah. I was pleasantly surprised that the challah I got happened to be orange-flavored. That meant the bread was the sweetest part of the sandwich, with the cheese mild and creamy and the strawberries a welcome tartness.

Tomorrow, I might put bananas with the strawberries. Or maybe I could top the strawberries with some fresh basil and make a sweet, syrupy balsamic reduction to dip the sandwich in. I was just telling my friend that my incredibly technical grad courses this semester are killing my creative brain. I hope today a little of that brain came back!

In my tweens, I developed a fail-proof system for making grilled cheese (since that was basically all I could cook). Butter both pieces of bread, then place them buttered sides together on the cutting board, so as not to get butter everywhere. Ingenious, right? I thought so. Anyway, then put your cheese and whatever else on top of the bread stack you made, then when you're ready to cook them, separate the buttered pieces and assemble the sandwich in the pan. This worked well for me today, since I could add one more smear of mascarpone to the top piece of bread before closing the sandwich.

Strawberry Mascarpone Grilled Cheese
adapted from Sweet & Saucy (be forewarned--the blog plays music)
4 slices brioche or challah bread
2 tbsp butter
2-4 tbsp mascarpone, as much as your heart desires
6 strawberries, rinsed and sliced
Butter one side of each slice of bread. Then smear 1-2 tbsp mascarpone on the other side of each slice. Place strawberry slices, overlapping, on top of mascarpone.
Heat cast iron skillet to medium heat. Cook sandwiches until browned on each side. Attend to the pan carefully, since these went from golden to black for me very quickly. Also, turn with care since the mascarpone doesn't really stick the slices together like a slice of American cheese would.

strawberry mascarpone grilled cheese

Tomorrow, I might put bananas with the strawberries. Or maybe I could top the strawberries with some fresh basil and make a sweet, syrupy balsamic reduction to dip the sandwich in. I was just telling my friend that my incredibly technical grad courses this semester are killing my creative brain. I hope today a little of that brain came back!

In my tweens, I developed a fail-proof system for making grilled cheese (since that was basically all I could cook). Butter both pieces of bread, then place them buttered sides together on the cutting board, so as not to get butter everywhere. Ingenious, right? I thought so. Anyway, then put your cheese and whatever else on top of the bread stack you made, then when you're ready to cook them, separate the buttered pieces and assemble the sandwich in the pan. This worked well for me today, since I could add one more smear of mascarpone to the top piece of bread before closing the sandwich.

Strawberry Mascarpone Grilled Cheese
adapted from Sweet & Saucy (be forewarned--the blog plays music)
4 slices brioche or challah bread
2 tbsp butter
2-4 tbsp mascarpone, as much as your heart desires
6 strawberries, rinsed and sliced
Butter one side of each slice of bread. Then smear 1-2 tbsp mascarpone on the other side of each slice. Place strawberry slices, overlapping, on top of mascarpone.
Heat cast iron skillet to medium heat. Cook sandwiches until browned on each side. Attend to the pan carefully, since these went from golden to black for me very quickly. Also, turn with care since the mascarpone doesn't really stick the slices together like a slice of American cheese would.
Thursday, March 24, 2011
graham...crackers?
I happen to have a lot of Japanese posts to make lately, but in the interest of showing that I do not only eat Asian food, I'll post a good ol' American burger recipe today. Actually, I'm just going to share the instructions for the onions. If you're like me, you know how to make sandwiches and burgers. You just need some ideas for different toppings sometimes. Even my beloved chipotle caramelized onions get old.

The onions atop Graham Elliot's Grahamburger are simple enough that I'll be making them many times in the future and flavorful enough that they stand out against a meaty burger patty. The vinegar and oil marinade gives the onions a kick that actually makes them seem fairly fresh and bright. The only change we'd make to this next time is to grill the top of the bun as well, a la the chargrilled lamb burger from The Breslin restaurant in NYC (no, we didn't take a trip there--I saw it on "The Best Thing I Ever Ate: Burgers"). The ciabatta bun was a tasty and substantial, but got a little bready on top and needed some crunch.

1 c apple cider vinegar
1/2 c olive oil
1 lg red onion, thinly sliced
Mix vinegar and oil in a medium bowl and toss onion slices in the mixture. Let sit for at least 10 minutes.
Heat grill pan over medium until very hot. Pat marinated onions dry and grill until soft and colored, about 3 minutes per side. Remove to bowl.

bison patty with brie, quick-pickled red onion, garlic mayo, and greens on ciabatta

Quick-Pickled Red Onions
from Serious Eats
Follow the link above to see full burger recipe.
1/2 c olive oil
1 lg red onion, thinly sliced
Mix vinegar and oil in a medium bowl and toss onion slices in the mixture. Let sit for at least 10 minutes.
Heat grill pan over medium until very hot. Pat marinated onions dry and grill until soft and colored, about 3 minutes per side. Remove to bowl.
Wednesday, March 23, 2011
umami
At the beginning of March was the grand opening of Madison's new ramen and dumpling restaurant, Umami, on Williamson Street. It's tucked up into a residential stretch, so if you blink, you might miss it. The Wednesday before the grand opening we tried a sampling of their menu for their "soft opening". We've had our eye on the development of the restaurant since the fall, so we were were thrilled when we finally got to try the food.

The restaurant's shell is a quaint old home that looks like it could have come out of a Miyazaki movie, but the interior is surprisingly modern with great atmosphere. We sat at the bar, which had a rough-hewn feel reminiscent of the ramen-ya where we ate at in Tokyo mixed with a sleek contemporary feel complete with backlighting.


We started out with tasty salads, which were not particularly Asian, but definitely solid. The inclusion of some not-so-Japanese items on the menu will prove helpful when we take less adventurous friends and family to Umami--and we certainly will!


We did not get shots of the gyoza (dumplings) since for the soft opening we were served passed dumplings on a platter. We enjoyed the traditional pork dumplings, but surprisingly liked the chicken and mushroom best. The pork bun and tuna poke were both impressive--the pork bun with a nicely cooked piece of pork belly on a fluffy steamed rice bun, and the poke a pile of fresh raw tuna tossed in a pleasantly spicy and gingery sauce. This from a woman who would never have considered eating raw fish a few years ago.

pork belly with hoisin and pickles on a steamed bun

tuna poke
The main event--and honestly the reason we went--was the ramen. Matt ordered the thicker, richer tonkotsu broth topped with pork and I tried the lighter miso broth with chicken. They also had a vegetarian option that we did not try. I had not had miso ramen previously, and that might be why I was surprised at its lightness. The miso ramen had a nicely cooked egg and tender chicken on top, but I still preferred Matt's (perhaps because a richer broth is what I'm used to) and ate a lot of his noodles. Tonkotsu broth is cloudy, salty, fatty, porky--definitely multidimensional--and the flavor seemed to soak into the noodles more than in the miso bowl. I didn't get any of the pork, but Matt (obviously) liked it and wished there had been more. Ultimately, both bowls had that essential smell and flavor of ocean that typifies Japanese food and took us right back.

tonkotsu ramen with pork (left) and miso ramen with chicken (right)
My dessert order was a no-brainer--green tea creme brulee. The tea flavor was not overwhelming, but present. I always enjoy a good creamy creme brulee with a nice crackly crust, and this hit the mark. Matt's ice cream sandwich was fine, but not a stand-out. I'd go with the brulee again next time.

green tea creme brulee
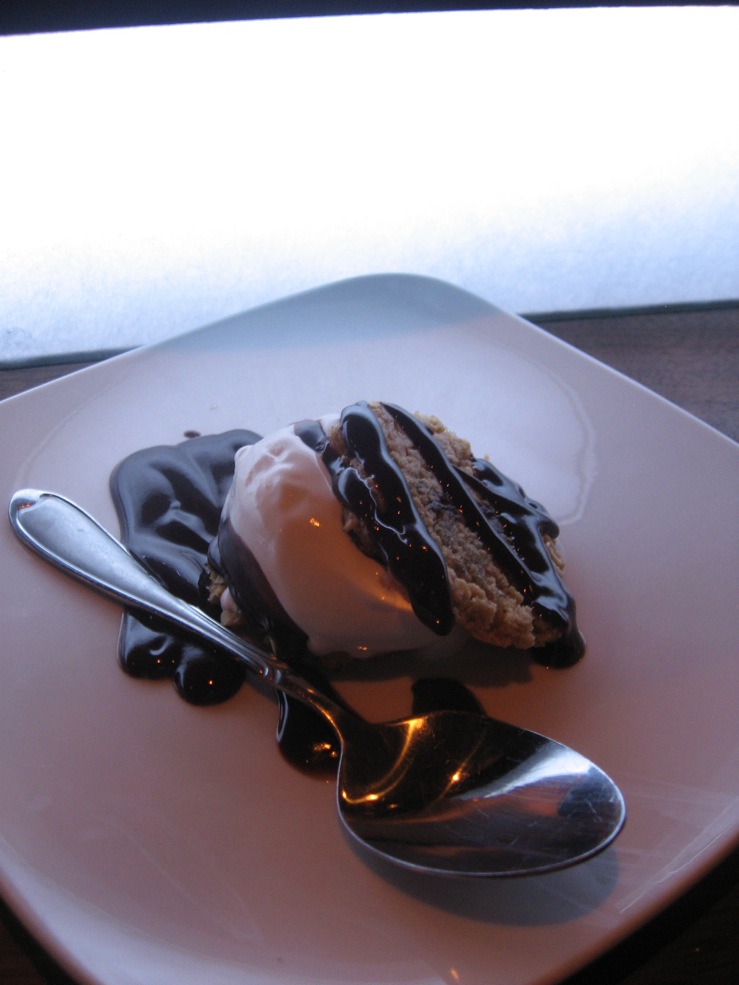
chocolate chip cookie ice cream sandwich
For their first week in operation, Umami made a great first impression. I look forward to trying their menu again and taking others there for the variety of tasty dishes and fun atmosphere.
Tuesday, March 22, 2011
tv dinner
So, I've already missed my goal of blogging every day during break. Last night the internet was out for awhile in the evening, and then I fell asleep on the (very orange) couch. Oh well.

I had already enjoyed Makiko Itoh's Just Bento and Just Hungry websites, so when Serious Eats posted recipes from her Just Bento Cookbook, I was ready to jump on the chance to try some reliable and fairly simple Japanese recipes. By the way, I just found out that Makiko lives what must be an amazing life split between Japan, Switzerland, and Southern France. Wow.

My first foray into Just Bento recipes was Chicken Karaage - Japanese fried chicken. I typically avoid frying foods at home, but this sounded too great to pass up. Unfortunately for my health, but fortunately for my taste buds, this frying adventure led to several more fried dishes in the following weeks.
The recipe called for boneless chicken thighs, which I was unable to find, so I struggled with pulling the bones out of a package of thighs. I do recommend using thighs, despite the hard work. All the fatty strains liquefied and just made the already juicy dark meat even more succulent. I opted to leave the skin off this time, but I'm sure my husband would have appreciated the inclusion of the skin.
The chicken karaage was meant to be a bento meal for the following day's lunch, but after our first bite, we couldn't stop eating until it was all gone. Best TV dinner ever.

Chicken Karaage
from the Just Bento Cookbook by Makiko Itoh via Serious Eats
This recipe was intended for one serving for a bento lunch. I quadrupled the recipe to use a 1-lb package of chicken thighs and it served two, although it could serve more if you are not as gluttonous as we were! We dipped our chicken pieces in green onion sauce as we ate them, but I'd be interested to see what the texture would be like if I followed the directions and dipped them right after frying.
Combine the chicken, soy sauce, saké, and ginger. Let marinate for at least 10 minutes or overnight. (If you need to leave it marinating for more than 12 hours, omit the soy sauce and add it 10 minutes before cooking, or the salt will draw out too much moisture from the chicken and make it dry.)
Remove the chicken pieces from the marinade, drain, and coat in the cornstarch.
Heat 1 inch (2.5cm) of vegetable oil in a saucepan over medium-high heat. Test the oil temperature by putting a little of the cornstarch-and-marinade coating on the end of a wooden chopstick and dipping it into the oil. If the coating sizzles and turns brown immediately, the oil is hot enough. If the oil starts getting smoky, turn down the heat.
Fry the chicken pieces in the oil, turning once, until a deep golden brown. Drain well on paper towels.
To make the green onion sauce, combine all the ingredients in a small frying pan over medium heat and stir until the sugar is dissolved. Put the chicken pieces in the pan and toss to coat each piece with the sauce.
Let cool completely before packing into a bento box. Putting a layer of arugula or other salad leaves under the chicken enhances the color of the chicken and provides another texture in the bento.
Note from Serious Eats: You can cook chicken karaage the night before. If I’m making this for dinner, I usually set aside a few pieces for the next day’s bento. Chicken kara-age can be frozen uncooked and marinated, or cooked. To freeze it uncooked and marinated, put the chicken and marinade (excluding the soy sauce) into a freezer bag. Defrost in the refrigerator in a bowl, adding the soy sauce before frying. Cooked frozen pieces can be defrosted in the refrigerator, then crisped up for a few minutes in a toaster oven. I don’t recommend defrosting cooked pieces in a microwave, since this will make the chicken tough.

I had already enjoyed Makiko Itoh's Just Bento and Just Hungry websites, so when Serious Eats posted recipes from her Just Bento Cookbook, I was ready to jump on the chance to try some reliable and fairly simple Japanese recipes. By the way, I just found out that Makiko lives what must be an amazing life split between Japan, Switzerland, and Southern France. Wow.

My first foray into Just Bento recipes was Chicken Karaage - Japanese fried chicken. I typically avoid frying foods at home, but this sounded too great to pass up. Unfortunately for my health, but fortunately for my taste buds, this frying adventure led to several more fried dishes in the following weeks.
The recipe called for boneless chicken thighs, which I was unable to find, so I struggled with pulling the bones out of a package of thighs. I do recommend using thighs, despite the hard work. All the fatty strains liquefied and just made the already juicy dark meat even more succulent. I opted to leave the skin off this time, but I'm sure my husband would have appreciated the inclusion of the skin.
The chicken karaage was meant to be a bento meal for the following day's lunch, but after our first bite, we couldn't stop eating until it was all gone. Best TV dinner ever.

Chicken Karaage
from the Just Bento Cookbook by Makiko Itoh via Serious Eats
This recipe was intended for one serving for a bento lunch. I quadrupled the recipe to use a 1-lb package of chicken thighs and it served two, although it could serve more if you are not as gluttonous as we were! We dipped our chicken pieces in green onion sauce as we ate them, but I'd be interested to see what the texture would be like if I followed the directions and dipped them right after frying.
1 lb boneless chicken thigh, with or without skin, cut into 3–4 pieces
4 tsp soy sauce (if you are not making the green onion sauce, increase to 2 tsp)
4 tbsp sake
4 tsp peeled and grated fresh ginger
vegetable oil, for deep-frying
8 tbsp cornstarch (or enough to cover chicken pieces)
handful green salad leaves or other vegetable
handful green salad leaves or other vegetable
cooked short-grain rice
For the green onion sauce:
4 tbsp rice vinegar
4 tbsp soy sauce
4 tbsp finely chopped green onion
Pinch sugar
A few drops sesame oil
Pinch sugar
A few drops sesame oil
4 tsp peeled and grated fresh ginger
Combine the chicken, soy sauce, saké, and ginger. Let marinate for at least 10 minutes or overnight. (If you need to leave it marinating for more than 12 hours, omit the soy sauce and add it 10 minutes before cooking, or the salt will draw out too much moisture from the chicken and make it dry.)
Remove the chicken pieces from the marinade, drain, and coat in the cornstarch.
Heat 1 inch (2.5cm) of vegetable oil in a saucepan over medium-high heat. Test the oil temperature by putting a little of the cornstarch-and-marinade coating on the end of a wooden chopstick and dipping it into the oil. If the coating sizzles and turns brown immediately, the oil is hot enough. If the oil starts getting smoky, turn down the heat.
Fry the chicken pieces in the oil, turning once, until a deep golden brown. Drain well on paper towels.
To make the green onion sauce, combine all the ingredients in a small frying pan over medium heat and stir until the sugar is dissolved. Put the chicken pieces in the pan and toss to coat each piece with the sauce.
Let cool completely before packing into a bento box. Putting a layer of arugula or other salad leaves under the chicken enhances the color of the chicken and provides another texture in the bento.
Note from Serious Eats: You can cook chicken karaage the night before. If I’m making this for dinner, I usually set aside a few pieces for the next day’s bento. Chicken kara-age can be frozen uncooked and marinated, or cooked. To freeze it uncooked and marinated, put the chicken and marinade (excluding the soy sauce) into a freezer bag. Defrost in the refrigerator in a bowl, adding the soy sauce before frying. Cooked frozen pieces can be defrosted in the refrigerator, then crisped up for a few minutes in a toaster oven. I don’t recommend defrosting cooked pieces in a microwave, since this will make the chicken tough.
Sunday, March 20, 2011
friday night pizza
I'm on spring break for the next week, so my goal is to blog every day--I definitely have plenty of pictures backed up.

On Friday nights I often feel like "junk food" to wind down the week and kick off the weekend. Sometimes it's a burger or nachos. Last week it was pizza. As spring creeps out of hiding more and more, I find myself wanting to eat more fruits and vegetables. On the other hand, it's still chilly at night and I want something hearty. So, I made a vegetarian pizza, but one with enough heft to fill me up. Meaty veggies like zucchini, eggplant, roasted peppers, or mushrooms are a must. This one involves roasted marinated mushrooms and zucchini. The marinade with its soy sauce for salt and maple syrup for sweetening may sound a little crunchy-granola, but trust me, it gives the whole thing a lot of depth. The recipe is from a whole foods (and I think vegan?) cookbook, so the original recipe didn't include cheese, but--hey--this is Wisconsin.
I am typically not ambitious enough to make my own pizza dough on any night of the week, but I am certainly not in the mood on Friday nights. I'd tried various flatbreads and pre-made crusts with some success, but I really liked the pita-marketed-as-pizza-crust from Kontos that I tried this time. The chewy, crispy crust was topped with the rich and tangy roasted and marinated veggies, a smoky and garlicky sauce, and melty fresh mozzarella. It was a hit and will certainly reappear in the summer when the vegetables are available locally.
My only complaint is that the zucchini left a bit of unwanted liquid behind under the cheese, so next time I would squeeze out some of the excess water before placing it on the pizza.

Rustic Tomato Thin Crust Pizza with Roasted Zucchini, Portobello Mushroom, and Red Onion
slightly adapted from The Balanced Plate by Renee Loux
Try this with a sprinkle of aleppo pepper or some peperoncini and a nice beer like New Glarus apple ale!
3 tbsp + 2 tsp olive oil
1-2 garlic cloves, minced
1 tsp balsamic vinegar
1 tsp soy sauce
1/2 tsp maple syrup
2 tsp fresh thyme or 1 tsp dried (optional)
1 large portobello mushroom or 5 baby bella (crimini) mushrooms, thinly sliced
1 medium zucchini, thinly sliced
Kosher salt
Black pepper
2 round flatbreads (6"), 2 tortillas (9"), or 1 large flatbread (9'-12')
1/2 c tomato sauce, purchased or homemade (see below for recipe)
2-4 oz fresh mozzarella, sliced
1/2 c thinly sliced red onion
6 cherry tomatoes, halved
Preheat the broiler. In a small bowl, mix together 1 1/2 tbsp olive oil, the garlic, balsamic, soy sauce, maple syrup, and thyme (if using). Pour over the mushroom and toss to coat evenly. Let stand for 10 minutes or more to absorb and develop flavor.
In a separate bowl, toss the zucchini with 2 tsp of olive oil. Sprinkle with a pinch of salt and pepper. Place both the mushroom and zucchini on a baking sheet under the broiler until browned, about 10-12 minutes. Set aside to cool. When cool enough to handle, gently press on the zucchini with a paper towel until the vegetable has released most of its excess water.
Preheat the oven to 500 degrees Fahrenheit. Brush one side of the bread or tortillas with the remaining 1 1/2 tbsp of olive oil. Place the oiled side face down on a baking sheet or pizza stone. This will make it crisp nicely. Spread the sauce evenly over the bread or tortillas, leaving just a 1/4" border at the edge. Distribute the mushroom and zucchini evenly. Cover with the mozzarella slices, then sprinkle the red onion slices and cherry tomato halves over the top of the cheese.
Bake on the middle rack for 15-20 minutes, until the edges are golden brown. Let cool enough to cut and serve.

Quick Tomato Sauce
28-oz can fire-roasted diced tomatoes
3-4 cloves garlic, minced
olive oil
Drizzle about 1 tbsp olive oil in a large saucepan. Heat on medium heat, then add the garlic and saute for 1-2 minutes, until beginning to brown. Add can of tomatoes with juices and cook, stirring frequently, until liquid is mostly cooked off and the sauce is thickened. Add salt if you like.
Subscribe to:
Posts (Atom)