Showing posts with label food. Show all posts

Sunday, January 29, 2012

eating in manhattan

waiting feet at Russ & Daughters

I need to finally get around to finishing my NYC posts, since I've already been on another food-heavy trip in the meantime.  There are just so many photos of delicious foods backlogged in iPhoto that I get overwhelmed and keep putting it on the back burner!  It's gotten so that I have neglected photographing meals that I cook, since I haven't been posting them anyway.  I want that to change!  And maybe it will soon enough, since I am now in my final semester of grad school.  We shall see.

On our trip in August, we didn't even make it onto the island of Manhattan until the last two days, and then we had a lot of catching up to do, food-wise.

Lower East Side


We are always on the lookout for a good donut, so I knew we couldn't miss the Doughnut Plant.  To start off our day of devouring fried doughs from all over the world, we bought a half dozen donuts.  Besides the one you see below, we also enjoyed flavors such as oatmeal, fresh peach, salted peanut, blackout, and a creme brulee raised donut.  Man, my mouth is watering just typing this.

tres leches donut


Cocoron Soba came highly recommended from Serious Eats and provided one of the lighter options of our day--yes, noodles dipped in scalding pork and kimchi was light, relatively speaking.  And it was incredibly satisfying to boot.
pork kimchee dip soba

Apparently the LES location of BaoHaus has closed since we went there, but it would be worth seeking out their new location for the tender, flavorful pork belly they serve.  

the Chairman Bao: braised Berkshire pork belly, crushed peanuts, cilantro, Haus relish, and Taiwanese red sugar

After recommendations from our buddies Joey and Tony, we had to hit up Russ & Daughters for bagels and lox to eat on some park steps.  To be honest, it was my first experience with lox (I realized lox was really not the same thing as smoked salmon) and I'm not sure I want to have it anywhere else after this.  It was that good.

 everything bagel with lox, scallion cream cheese, red onion, and tomato

On the same park steps, we enjoyed our first knish.  Every little place on Coney Island sells knishes, but our traveling host let us know that those are typically just frozen, heavy prepackaged things that they reheat.  Although this knish from Yonah Schimmel Knishery was not exactly light (you should feel the heft of these things), the pastry was flaky and buttery and the potato filling well-seasoned.  Since we were amateurs at knish-eating, we got ours topped with cheese.  You can take the kids out of Wisconsin...anyway.

mozzarella knish 

Vanessa's Dumplings was just on the edge of Chinatown and on many lists of the best dumplings in the area.  I didn't have any other dumpling with which to compare, but I certainly wasn't complaining about these.  Be sure to find the Chinatown location, though, where dumplings come 5 for $1.  The newish midtown location gets away with charging $3 for the same number.  Please excuse the terrible photography as we were shooting in the low light of an apartment stoop.

pork dumplings

 steamed pork buns

sesame duck pancake - we were so stuffed by this point, but couldn't pass up the chance to try this

 Midtown


I don't know my New York geography all that well, so if I put a restaurant in the wrong neighborhood, please go easy on me.


One of my major goals in visiting NYC was to eat in Flushing.  The other was to eat at a Momofuku location.  Weird how I wanted to eat at the most authentic Asian restaurants and also one of the most popularized Asian chains.

Because we couldn't afford--or even get a spot in--the high-end Momofuku restaurant, we opted for the  Ssam Bar, with their delicious-sounding duck lunches.  Indeed, delicious they were.

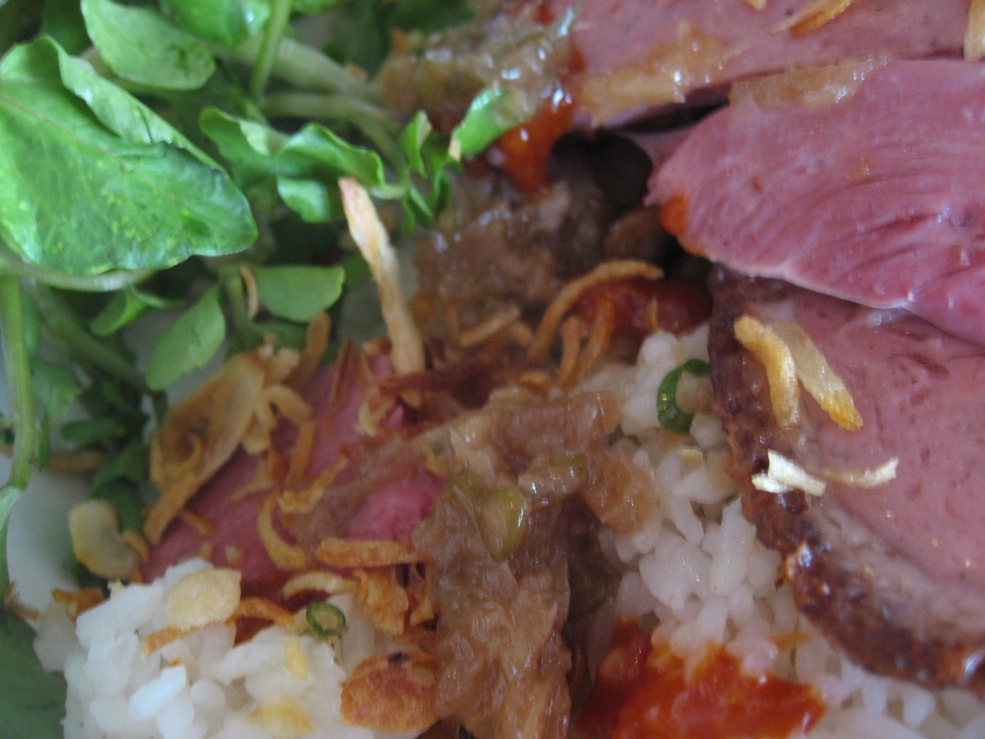
rotisserie duck over rice with greens and many tasty sauces

 steamed bun with pulled duck, sauerkraut, and smoked mayo

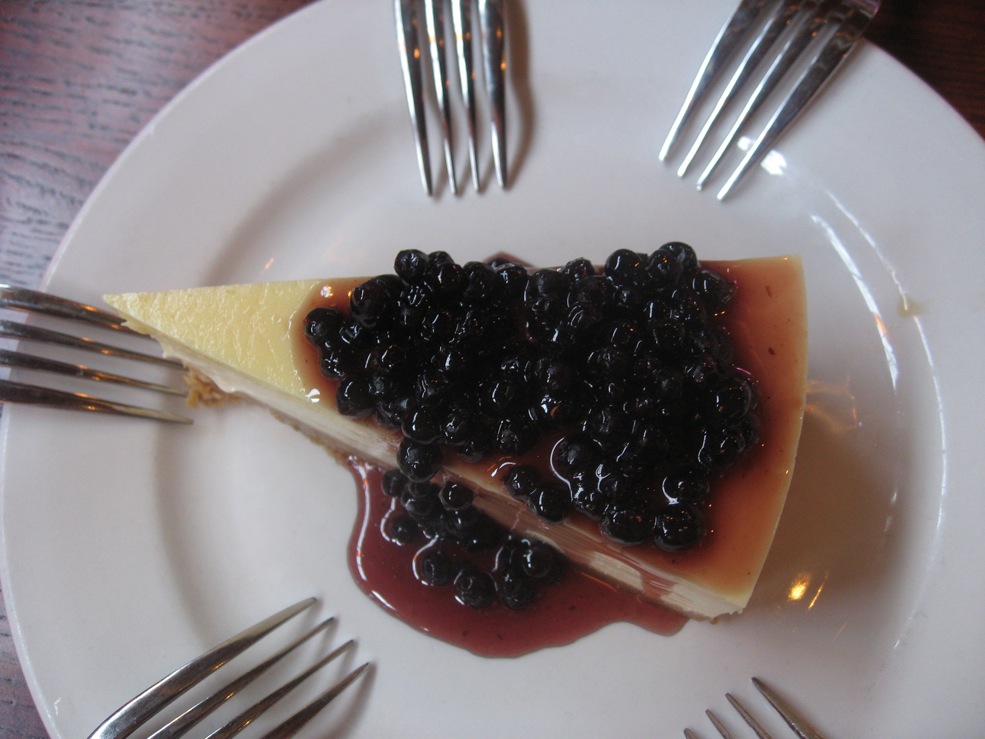
Waddling across the street, we completed the Momofuku experience by visiting Milk Bar.  We had read some complaints that the quality was compromised when Milk Bar had recently centralized their baking operations and sent prepackaged sweets out to their several locations.  I couldn't say for sure, but I do wonder whether the cookies wouldn't have been better fresh.  However, we had no complaints about the pies...

 candy bar pie

aptly-named crack pie

compost cookie - not pictured: cornflake marshmallow and blueberry cream

We waited in line for an hour to get ice cream at the Big Gay Ice Cream Truck (since expanded into the Big Gay Ice Cream Shop), but it was worth it.  The line moves slowly because the proprietor does everything himself: he takes your order, pulls the soft serve, carefully injects it with dulce de leche, grinds sea salt over it, dips it in chocolate shell, and handles the money.  So good.

 the Salty Pimp

West Village


Our only foray into the West Village was motivated by--surprise--food.  We had read--and had it confirmed by a New Yorker--that Taim had the best falafel in the city.  I had not had a ton of falafel, and the falafel Matt had tasted he had not enjoyed.  We both loved this.  The green variety really is green, packed with herbs and flavor.  Coupled with a refreshing mint ginger limeade, the sandwich made me forget my tired feet for 20 minutes.

 green falafel sandwich with hummus, israeli salad, pickled cabbage, and tahini sauce

That's it (finally) for my New York photos!  Hope they were informative and inspiring.  Check back for pics from our recent Portland trip and (hopefully) more home-cooked meal posts!

Wednesday, August 17, 2011

all good summer things

I have been criminally lax about updating this blog, especially for the summertime!  In my defense, I've had a full course load this summer, but I have a few weeks between summer classes and fall classes to try and be productive.  I am going to really make an effort to update things this fall, if for no other reason than to feel like I'm doing something.


Anyway, I thought it was about time I posted a recipe.  We made this a few weeks back with one of the first summer tomatoes (from the farmer's market--we killed our tomato plant).  We also happened to have an abundance of blue cheese leftover from another meal.  We always have basil (out back), crusty bread, and our old standby, Sashay Acres bacon, on hand.  A meal was born.

Actually, we ate this as an appetizer, but it would be more than enough as an entree.  I only stacked our salads a few tomato slices high, but next time I'd go even lower--one or two slices only--for easier eating.  Next time I also think I'll splurge on the fancy French gray shallots at the farmer's market for more intense shallot flavor in the dressing.

Heirloom Tomato Salad with Bacon, Blue Cheese, and Basil
very slightly adapted from Gourmet via Epicurious
serves 2 (easily multiplied)


2 slices crusty white bread, like sourdough
4 slices bacon (depending on how porky you like your veggies)
olive oil (if needed)
1/4 c finely chopped shallot
3 tbsp Sherry vinegar
2-3 assorted medium heirloom tomatoes, cut 1/4- to 1/3-inch thick
15 small fresh basil leaves
1 1/2 oz blue cheese, at room temperature, crumbled

Cook bacon in (cast iron, preferably) pan until crisp, and remove to paper towels.  Leave bacon drippings in pan.

In the same pan, toast bread on both sides in bacon drippings over medium heat.  If you don't like your bread bacon-y, pour off drippings into a heatproof bowl and reserve.  Heat about a tablespoon of olive oil in the same pan and toast bread.

Using remaining bacon drippings (pour them back in the pan if you poured them off), plus a couple tablespoons olive oil if the pan is getting dry, cook shallots over medium heat, stirring, until softened, about 2 minutes.  Add vinegar and simmer, whisking, until emulsified, about 1 minute.  Season dressing with salt and pepper and keep warm.

Crumble bacon.  Arrange bread on plates and divide tomato slices among them, stacking slices and sprinkling some basil and bacon between slices. Sprinkle cheese and remaining basil and bacon over and around tomatoes. Spoon some of warm bacon dressing over and around tomatoes and season with salt and pepper.

Wednesday, July 13, 2011

portland: dinner highlights

So, onto the other meal we ate in Portland.  There were no lunches, since the breakfasts were so huge.  Even though we ate at a lot more breakfast spots than dinner places, the dinners we had were some of my favorite meals on our trip.

Pause

Wonderful seasonal and local dishes.  I got to try my first fiddlehead fern and huckleberries.  Seemed like sort of a Portland version of our favorite restaurants in Madison.  Great for grown-ups and kids.

special: seared halibut with morels, fingerling potatoes, fiddlehead ferns, and tarragon vinaigrette

braised pork collar over greens and potatoes with apple butter

cuban sandwich with ham, roasted pork, house-made pickles, and mustard aioli

huckleberry cheesecake


Toro Bravo

A Spanish tapas joint--my first tapas meal.  We each ordered something we thought sounded good, then shared.  It was a very nice, though dark, birthday meal for Matt.

fideos with spring vegetables and bacon

drunken grilled pork over avocado salad

braised lamb with coriander and apricots over house-made noodles 
(my personal favorite of the night)


Would definitely return for more spicy, rich, sticky Thai food.  Whiskey Soda Lounge would make a fun stop--their related bar across the street serves really intriguing Thai appetizers.

clockwise from top right:
khao soi kai - curry noodle soup
duck larb issan
sticky rice & sides
sai ua samun phrai - Ching Mai spicy sausage
Vietnamese fish sauce wings

huckleberry drinking vinegars

Sunday, May 8, 2011

happy mother's day


Today on Mother's Day I'm thinking about how much of my cooking abilities and interests are because my mom also loved to cook.  I have often observed that I was never taught to do things like cut fruits and vegetables--I just sat and watched my mom.  I know how to make basic meals without a recipe the same way my mom did, which oftentimes I think she learned from her mom.  I hope I can pass that knowledge along someday.  I also give her credit for helping me develop my tastes in food.  She introduced me to different flavors from early on and set the ball rolling for me to expand my tastes more and more.   Cooking and eating are such a big part of my life and I enjoy sharing it with my mom still.  Thanks, Mom!


Orecchiette with Broccoli Rabe and Goat Cheese
from Serious Eats (I think there's a missing step in their recipe, so I've filled in the blanks below with what I did.)

1 lb broccoli rabe, chopped
1/3 c extra-virgin olive oil
6 garlic cloves, chopped
3/4 tsp crushed red chile flakes
12 oz orecchiette (I can never find orecchiette at my grocery store, so I used a short-cut pasta that looked close enough.)
2 tbsp lemon zest
4 oz goat cheese, sliced 
salt
 

Pour about 8 quarts of water into a large pot, add a few tablespoons of salt, and bring it to a boil. Toss in the broccoli rabe and cook for 4 minutes. Remove it with a pair of tongs and immediately toss it in some ice water. Chill for a few minutes then drain and pat dry.

Heat the olive oil in a large skillet on medium heat.  Add the garlic and red pepper flakes and saute 1-2 minutes until garlic is just golden.  Add the broccoli rabe and cook 3-5 minutes until stalks are tender and the leaves wilted.

Meanwhile, bring the pot of water back to a boil and cook the orecchiette according to the directions on the box. Taste the pasta with a minute left on the timer. If al dente, turn off the heat, drain the pasta, and transfer it to the skillet. Turn the heat to high, add the lemon zest, and season with salt. Cook for a minute, stirring constantly.

Transfer the pasta to bowls or plates. Add a bit of goat cheese to each one. Serve.

Monday, April 18, 2011

easy french onion soup

Okay, so here comes the second soup post in a row.  But that's because I could probably eat soup every other day.  And it's an easy meal to make hearty and yet vegetarian.  The soup I made used chicken broth, but could easily be made with a nice homemade veggie broth.  I keep scraps of veggies and chicken or other meat bones in large bags in the freezer, then when I need broth, I just pop the contents of the bag into the crock pot, covered with water, and cook it on low for 18-24 hours.  How long you let it go depends on how strong you want your broth and how stinky you are willing to let your house get.  Ha.

french onion soup on Matt's grandma's handmade hotpad

I liked that this recipe was simple, but I thought it was just a tad bit too simple, so I added a couple of garlic cloves and some dried thyme to the onions.  Then it seemed just right.

 you know it's good--look at that doggy snout trying to get at it!


Quick, Light French Onion Soup
slightly adapted from Serious Eats
serves 4


1 pound sweet white or yellow onions, peeled and thinly sliced
2 cloves garlic, thinly sliced
1 tsp dried thyme
2 cups dry white wine, such as Muscadet
2 tablespoons butter
6 cups chicken or vegetable stock, preferably homemade
1 bay leaf
4 slices crusty bread or baguette
2 cups (5 ounces) freshly grated Gruyere cheese
Preheat the oven to 500°F. Combine the onions, garlic, thymewine, butter, and a large pinch of salt in a baking dish and cook, uncovered, until the wine is absorbed almost completely into the onions, and they are tender and golden, 45 minutes or perhaps a little longer.
In the meantime, bring the chicken or vegetable stock and bay leaf to a simmer in a large saucepan. Season to taste with salt and pepper.
When the onions are finished, divide them among 4 deep broiler-safe bowls. Cover the onions with chicken stock to fill the bowls, and place a slice of bread on each. Distribute the grated cheese over the bread and broil until the cheese is golden and bubbling, 2 to 3 minutes. 


Sunday, April 10, 2011

early spring warmth

We're still at a point in the spring season where we'll see chilly and rainy and generally miserable days, so I still need soup.  But I'm definitely getting to the point where I want lighter, more vegetable-based foods.  This soup provided a nice balance.


I love Cook's Country's take on posole, but I can only take that fatty, pork-filled stew so often.  This potato soup begins with a similar pureed onion and chili base.  I opted for a can of crushed fire-roasted tomatoes instead of crushed fresh, but if you have nice fresh tomatoes around, go for it.

I also wanted to add another texture or flavor, and debated between frozen sweet corn or hominy.  I decided on hominy this time to keep the flavors smoky and earthy like the pork posole.  If I make this later into the spring or summer it would be nice to use frozen or fresh sweet corn to brighten up the whole soup.

Mexican Potato Soup
adapted from Serious Eats
1 lb boiling potatoes, peeled and diced (about 2 cups)
Kosher salt 
28-oz can crushed fire-roasted tomatoes or 3 large red ripe tomatoes, about 1 1/4 pounds, peeled and coarsely chopped
1 medium onion, coarsely chopped (about 1 cup)
2 cloves garlic, coarsely chopped
1 canned chipotle in adobo sauce, coarsely chopped
2 c homemade chicken or vegetable stock (of course, go for veggie broth if you want it vegetarian)
28-oz can hominy (optional)
1/3 c cilantro, finely chopped
Place in large saucepan and cover with water by about three inches. Season water with salt. Bring to a boil and cook until tender but firm to the bite (potatoes will cook further in step 2). Drain potatoes and set aside. Meanwhile, blend tomatoes, onion, garlic, and chipotle pepper in blender at high speed until smooth, about 30 seconds.
Pour tomato mixture into large saucepan. Add vegetable stock and potatoes. Stir to combine and season to taste with salt. Bring to a boil over medium-high heat. Reduce heat to medium and simmer until potatoes are completely tender, about 7 to 8 minutes. For thicker broth, mash a few potatoes against side of pot with wooden spoon. Add cilantro and hominy (if using) simmer for 2 minutes longer, or until hominy is warm. Serve immediately with extra cilantro and sour cream (I use Greek yogurt) as desired. 


Sunday, March 27, 2011

gorgonzola tortellini


Awhile back I picked up a package of gorgonzola tortellini from a great Madison pasta maker, RP's.  Our local grocery store just started carrying it again to my delight.  Anytime I can buy a local product I'm happy, but especially so when the product is high quality and not prohibitively expensive.  I figured I'd find something to do with it and went searching for a recipe.

 gorgonzola tortellini with walnut cream sauce
on my favorite Charley Harper book!

What do you know, but RP's has suggested recipes at their site for their pastas!  I gladly accepted the suggestion, but added some sauteed mushrooms and peas.  The vegetables brought some much-needed freshness to the otherwise heavy dish.  I also swapped the sour cream out for non-fat Greek yogurt, which may have been the reason my sauce was less than smooth.  I'll take any pointers anyone has for keeping a cream sauce from breaking!  In any case, the texture was not ultimately affected since the final addition of ground walnuts makes the sauce lumpy anyway.

Oh, and this is the prequel to the mascarpone post from the other day.


Gorgonzola Tortelloni with Walnut Cream Sauce
adapted from RP's Fresh Pasta
serves 2

I used less pasta then the recipe called for, but kept the sauce ingredients the same, since I like a saucy pasta.  If you like things a bit drier, cut back the sauce ingredients or up the pasta to 1 lb.

1/2 c walnuts
9 oz  RP's Fresh or Frozen Gorgonzola Tortellini
3 tbsp butter
5 crimini (baby bella) mushrooms, sliced
1 clove garlic crushed
1/3 c milk
1/2 c sour cream or plain yogurt
1/3 c mascarpone cheese
1 c fresh or frozen peas
1/4 tsp salt

 Heat an empty pan over medium heat and cook walnuts until browned.  Grind toasted walnuts in a food processor or spice grinder.  Wipe out the pan carefully with a paper towel. 

Return pan to heat and melt 1-2 tbsp butter.  Cook mushroom slices in butter until browned and cooked down, about 5 minutes.  Add garlic and cook 1-2 more minutes.  Add milk, sour cream or yogurt, and mascarpone.  Add peas and bring to a light simmer and reduce slightly.

Add ground walnuts and salt.  Boil gorgonzola tortellini until tender and top with sauce. Garnish with chopped fresh parsley.

Friday, March 25, 2011

breakfast of champions

You know how you buy an ingredient for a recipe, use the tiniest scoop, then have the majority of it left to deal with?  How sometimes those things go bad before you can find a use for them?  With the recipe I found, a leftover container of mascarpone is not a problem. 

strawberry mascarpone grilled cheese

 This sandwich was inspired by a recipe for a mascarpone and Nutella grilled cheese topped with strawberries, but if I bought a jar of Nutella, I'd be in the same mess all over again.  And as good as Nutella is, I didn't want it around to chocolify every breakfast.  So, I cut the Nutella and put the strawberries inside the sandwich.  Also, the recipe called for brioche, which I couldn't find at my local grocery store, so I went with challah.  I was pleasantly surprised that the challah I got happened to be orange-flavored.  That meant the bread was the sweetest part of the sandwich, with the cheese mild and creamy and the strawberries a welcome tartness.


Tomorrow, I might put bananas with the strawberries.  Or maybe I could top the strawberries with some fresh basil and make a sweet, syrupy balsamic reduction to dip the sandwich in.  I was just telling my friend that my incredibly technical grad courses this semester are killing my creative brain.  I hope today a little of that brain came back!


In my tweens, I developed a fail-proof system for making grilled cheese (since that was basically all I could cook).  Butter both pieces of bread, then place them buttered sides together on the cutting board, so as not to get butter everywhere.  Ingenious, right?  I thought so.  Anyway, then put your cheese and whatever else on top of the bread stack you made, then when you're ready to cook them, separate the buttered pieces and assemble the sandwich in the pan.  This worked well for me today, since I could add one more smear of mascarpone to the top piece of bread before closing the sandwich.


Strawberry Mascarpone Grilled Cheese
adapted from Sweet & Saucy (be forewarned--the blog plays music)

4 slices brioche or challah bread
2 tbsp butter
2-4 tbsp mascarpone, as much as your heart desires
6 strawberries, rinsed and sliced

Butter one side of each slice of bread.  Then smear 1-2 tbsp mascarpone on the other side of each slice.  Place strawberry slices, overlapping, on top of mascarpone.

Heat cast iron skillet to medium heat.  Cook sandwiches until browned on each side.  Attend to the pan carefully, since these went from golden to black for me very quickly.  Also, turn with care since the mascarpone doesn't really stick the slices together like a slice of American cheese would.

Thursday, March 24, 2011

graham...crackers?

I happen to have a lot of Japanese posts to make lately, but in the interest of showing that I do not only eat Asian food, I'll post a good ol' American burger recipe today.  Actually, I'm just going to share the instructions for the onions.  If you're like me, you know how to make sandwiches and burgers.  You just need some ideas for different toppings sometimes.  Even my beloved chipotle caramelized onions get old.

bison patty with brie, quick-pickled red onion, garlic mayo, and greens on ciabatta

The onions atop Graham Elliot's Grahamburger are simple enough that I'll be making them many times in the future and flavorful enough that they stand out against a meaty burger patty.  The vinegar and oil marinade gives the onions a kick that actually makes them seem fairly fresh and bright.  The only change we'd make to this next time is to grill the top of the bun as well, a la the chargrilled lamb burger from The Breslin restaurant in NYC (no, we didn't take a trip there--I saw it on "The Best Thing I Ever Ate: Burgers").  The ciabatta bun was a tasty and substantial, but got a little bready on top and needed some crunch.


Quick-Pickled Red Onions

Follow the link above to see full burger recipe.

1 c apple cider vinegar
1/2 c olive oil
1 lg red onion, thinly sliced 

Mix vinegar and oil in a medium bowl and toss onion slices in the mixture.  Let sit for at least 10 minutes.  

Heat grill pan over medium until very hot. Pat marinated onions dry and grill until soft and colored, about 3 minutes per side. Remove to bowl. 

Tuesday, March 22, 2011

tv dinner

So, I've already missed my goal of blogging every day during break.  Last night the internet was out for awhile in the evening, and then I fell asleep on the (very orange) couch.  Oh well.


I had already enjoyed Makiko Itoh's Just Bento and Just Hungry websites, so when Serious Eats posted recipes from her Just Bento Cookbook, I was ready to jump on the chance to try some reliable and fairly simple Japanese recipes.  By the way, I just found out that Makiko lives what must be an amazing life split between Japan, Switzerland, and Southern France.  Wow.


My first foray into Just Bento recipes was Chicken Karaage - Japanese fried chicken.  I typically avoid frying foods at home, but this sounded too great to pass up.  Unfortunately for my health, but fortunately for my taste buds, this frying adventure led to several more fried dishes in the following weeks.

The recipe called for boneless chicken thighs, which I was unable to find, so I struggled with pulling the bones out of a package of thighs.  I do recommend using thighs, despite the hard work.  All the fatty strains liquefied and just made the already juicy dark meat even more succulent.  I opted to leave the skin off this time, but I'm sure my husband would have appreciated the inclusion of the skin.

The chicken karaage was meant to be a bento meal for the following day's lunch, but after our first bite, we couldn't stop eating until it was all gone.  Best TV dinner ever.


Chicken Karaage
from the Just Bento Cookbook by Makiko Itoh via Serious Eats

This recipe was intended for one serving for a bento lunch.  I quadrupled the recipe to use a 1-lb package of chicken thighs and it served two, although it could serve more if you are not as gluttonous as we were!  We dipped our chicken pieces in green onion sauce as we ate them, but I'd be interested to see what the texture would be like if I followed the directions and dipped them right after frying.

1 lb boneless chicken thigh, with or without skin, cut into 3–4 pieces  
4 tsp soy sauce (if you are not making the green onion sauce, increase to 2 tsp) 
4 tbsp sake 
4 tsp peeled and grated fresh ginger 
vegetable oil, for deep-frying 
8 tbsp cornstarch (or enough to cover chicken pieces)
handful green salad leaves or other vegetable
cooked short-grain rice
For the green onion sauce: 
4 tbsp rice vinegar 
4 tbsp soy sauce 
4 tbsp finely chopped green onion
Pinch sugar
A few drops sesame oil  
4 tsp peeled and grated fresh ginger

Combine the chicken, soy sauce, saké, and ginger. Let marinate for at least 10 minutes or overnight. (If you need to leave it marinating for more than 12 hours, omit the soy sauce and add it 10 minutes before cooking, or the salt will draw out too much moisture from the chicken and make it dry.)
 
Remove the chicken pieces from the marinade, drain, and coat in the cornstarch.

Heat 1 inch (2.5cm) of vegetable oil in a saucepan over medium-high heat. Test the oil temperature by putting a little of the cornstarch-and-marinade coating on the end of a wooden chopstick and dipping it into the oil. If the coating sizzles and turns brown immediately, the oil is hot enough. If the oil starts getting smoky, turn down the heat.

Fry the chicken pieces in the oil, turning once, until a deep golden brown. Drain well on paper towels.

To make the green onion sauce, combine all the ingredients in a small frying pan over medium heat and stir until the sugar is dissolved. Put the chicken pieces in the pan and toss to coat each piece with the sauce.

Let cool completely before packing into a bento box. Putting a layer of arugula or other salad leaves under the chicken enhances the color of the chicken and provides another texture in the bento.

Note from Serious Eats: You can cook chicken karaage the night before. If I’m making this for dinner, I usually set aside a few pieces for the next day’s bento. Chicken kara-age can be frozen uncooked and marinated, or cooked. To freeze it uncooked and marinated, put the chicken and marinade (excluding the soy sauce) into a freezer bag. Defrost in the refrigerator in a bowl, adding the soy sauce before frying. Cooked frozen pieces can be defrosted in the refrigerator, then crisped up for a few minutes in a toaster oven. I don’t recommend defrosting cooked pieces in a microwave, since this will make the chicken tough. 

Sunday, March 20, 2011

friday night pizza

I'm on spring break for the next week, so my goal is to blog every day--I definitely have plenty of pictures backed up.


On Friday nights I often feel like "junk food" to wind down the week and kick off the weekend.  Sometimes it's a burger or nachos.  Last week it was pizza.  As spring creeps out of hiding more and more, I find myself wanting to eat more fruits and vegetables.  On the other hand, it's still chilly at night and I want something hearty.  So, I made a vegetarian pizza, but one with enough heft to fill me up.  Meaty veggies like zucchini, eggplant, roasted peppers, or mushrooms are a must.  This one involves roasted marinated mushrooms and zucchini.  The marinade with its soy sauce for salt and maple syrup for sweetening may sound a little crunchy-granola, but trust me, it gives the whole thing a lot of depth.  The recipe is from a whole foods (and I think vegan?) cookbook, so the original recipe didn't include cheese, but--hey--this is Wisconsin.

I am typically not ambitious enough to make my own pizza dough on any night of the week, but I am certainly not in the mood on Friday nights.  I'd tried various flatbreads and pre-made crusts with some success, but I really liked the pita-marketed-as-pizza-crust from Kontos that I tried this time. The chewy, crispy crust was topped with the rich and tangy roasted and marinated veggies, a smoky and garlicky sauce, and melty fresh mozzarella.  It was a hit and will certainly reappear in the summer when the vegetables are available locally.

My only complaint is that the zucchini left a bit of unwanted liquid behind under the cheese, so next time I would squeeze out some of the excess water before placing it on the pizza.


Rustic Tomato Thin Crust Pizza with Roasted Zucchini, Portobello Mushroom, and Red Onion
slightly adapted from The Balanced Plate by Renee Loux

Try this with a sprinkle of aleppo pepper or some peperoncini and a nice beer like New Glarus apple ale!

3 tbsp + 2 tsp olive oil
1-2 garlic cloves, minced
1 tsp balsamic vinegar
1 tsp soy sauce
1/2 tsp maple syrup
2 tsp fresh thyme or 1 tsp dried (optional)
1 large portobello mushroom or 5 baby bella (crimini) mushrooms, thinly sliced
1 medium zucchini, thinly sliced
Kosher salt
Black pepper
2 round flatbreads (6"), 2 tortillas (9"), or 1 large flatbread (9'-12')
1/2 c tomato sauce, purchased or homemade (see below for recipe)
2-4 oz fresh mozzarella, sliced

1/2 c thinly sliced red onion
6 cherry tomatoes, halved

Preheat the broiler.  In a small bowl, mix together 1 1/2 tbsp olive oil, the garlic, balsamic, soy sauce, maple syrup, and thyme (if using).  Pour over the mushroom and toss to coat evenly.  Let stand for 10 minutes or more to absorb and develop flavor.

In a separate bowl, toss the zucchini with 2 tsp of olive oil.   Sprinkle with a pinch of salt and pepper.  Place both the mushroom and zucchini on a baking sheet under the broiler until browned, about 10-12 minutes.  Set aside to cool.  When cool enough to handle, gently press on the zucchini with a paper towel until the vegetable has released most of its excess water.

Preheat the oven to 500 degrees Fahrenheit.  Brush one side of the bread or tortillas with the remaining 1 1/2 tbsp of olive oil.  Place the oiled side face down on a baking sheet or pizza stone.  This will make it crisp nicely.  Spread the sauce evenly over the bread or tortillas, leaving just a 1/4" border at the edge.  Distribute the mushroom and zucchini evenly.  Cover with the mozzarella slices, then sprinkle the red onion slices and cherry tomato halves over the top of the cheese.

Bake on the middle rack for 15-20 minutes, until the edges are golden brown.  Let cool enough to cut and serve.


Quick Tomato Sauce

28-oz can fire-roasted diced tomatoes
3-4 cloves garlic, minced
olive oil

Drizzle about 1 tbsp olive oil in a large saucepan.  Heat on medium heat, then add the garlic and saute for 1-2 minutes, until beginning to brown.  Add can of tomatoes with juices and cook, stirring frequently, until liquid is mostly cooked off and the sauce is thickened.  Add salt if you like.